Home Artistry: DIY Projects for Creative Minds

Welcome to the world of Home Artistry, where DIY projects are taken to a whole new level by the creative minds of everyday folks. If you’ve ever felt the urge to turn your home into a work of art (or at least a Pinterest-worthy masterpiece), then get ready to unleash your inner artist and embark on a hilarious, inspiring, and maybe slightly disastrous journey into the world of DIY home décor. So grab your glue gun, dust off your paintbrushes, and prepare to embark on a crafty adventure like no other.
Key Principles of Home Artistry
When it comes to home artistry, there are a few key principles to keep in mind. You might think it’s all about picking the right paint color or finding the perfect throw pillows, but there’s so much more to it than that. Here are some essential guidelines to help you become a master of home artistry:
- Embrace your inner eccentric: Don’t be afraid to get a little wild with your design choices. Mix and match patterns, colors, and textures to create a space that truly reflects your unique personality.
- DIY or die: Sure, you could buy that fancy piece of art or furniture, but where’s the fun in that? Get crafty and make your own masterpieces. Trust us, nothing says “home artistry” like a hand-painted lampshade or a DIY macramé wall hanging.
- Think outside the box: Who says every room needs a bed or a dining table? Get creative with your room layouts and furniture choices. Maybe your bedroom would look better with a hammock instead of a bed, or your dining room could double as a home office. The sky’s the limit!
So there you have it – the . Remember, the most important thing is to have fun and let your creativity shine. Who knows, you might just become the next Picasso of home décor!
Choosing the Right Materials for DIY Projects
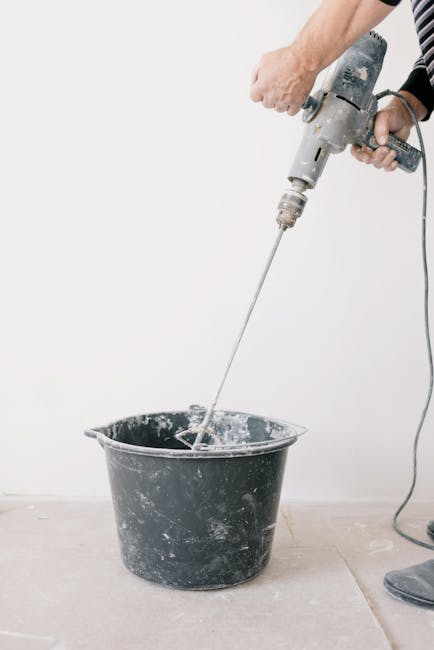
When embarking on a DIY project, choosing the right materials is crucial. You wouldn’t want to end up with a wonky table because you used flimsy cardboard instead of sturdy wood. Here are some tips to help you select the perfect materials for your next DIY endeavor:
- Think about the durability: Consider how long you want your masterpiece to last. If you’re building a birdhouse, cardboard might suffice. But if you’re constructing a dining table, opt for something more substantial like solid wood.
- Consider the aesthetic: Do you want your creation to be stylish and trendy, or do you prefer a rustic or vintage look? Choose materials that complement the overall vibe you’re going for. Remember, glitter and duct tape might not always be the best design choices.
- Budget wisely: While it might be tempting to splurge on high-end materials, sometimes you can achieve the same results with more budget-friendly options. Don’t break the bank just for the sake of a DIY project. It’s all about creativity, not bankrupting yourself.
Ultimately, the right materials can make or break your DIY project. So take your time, do your research, and have fun creating something amazing with materials that suit your vision. And remember, if all else fails, duct tape fixes everything. Happy crafting!
Step-by-Step Guide to Creating Your Own Masterpiece
So, you’ve decided to unleash your inner artist and create a masterpiece. Congratulations! Here are a few simple steps to guide you through the process:
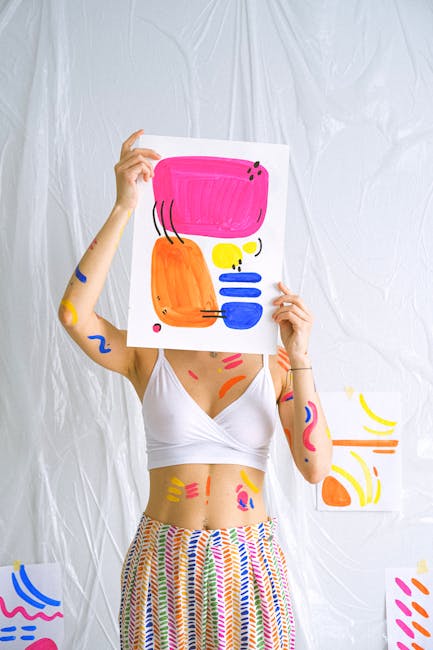
First things first, gather your supplies. You’ll need a canvas, some paint brushes, a palette, and of course, an assortment of colorful paint. Don’t forget to put on your ”artist” hat for good measure!
Next, it’s time to channel your creativity and let your imagination run wild. Don’t worry about making mistakes – remember, there are no accidents in art, only happy little accidents, as Bob Ross would say. Embrace the process and see where your muse takes you.
- Start by sketching out your idea on the canvas
- Use bold, confident strokes with your brushes
- Experiment with different colors and textures
And voilà! Before you know it, you’ll have created a masterpiece that’s uniquely yours. So go ahead, grab your supplies, unleash your creativity, and let the magic happen. Who knows, you might just discover the next Picasso within you!
Exploring Different Artistic Techniques
Ever wondered what goes into creating a masterpiece?
Well, let me tell you, it’s not just about slapping some paint on a canvas and calling it a day. There are so many different artistic techniques out there that artists use to bring their vision to life.
From the classic oil painting to the avant-garde mixed media, artists have been experimenting with different mediums and methods for centuries. Here are a few of the most popular techniques that you might want to try out yourself:
- Collage: Who knew that tearing up old magazines and gluing them onto a canvas could result in such a striking piece of art?
- Impasto: This technique involves applying thick layers of paint to a canvas to create texture and depth. Bonus points if you manage to get more paint on yourself than on the canvas!
- Pointillism: Want to feel like you’re starring in your very own Seurat painting? Just grab a bunch of tiny dots and get to work creating a masterpiece one spot at a time.

Tips for Incorporating Personal Style into Home Decor
So, you want to spruce up your living space with a little touch of your unique personality? Look no further, because I’ve got some tips that will help you incorporate your personal style into your home decor without breaking the bank or causing a design disaster!
First things first, take a good look at your wardrobe. Your favorite outfits and accessories can give you some serious insight into your personal style. Do you love bold patterns and bright colors? Opt for a statement wall or a funky area rug to bring that same energy into your home. Are you more of a minimalist? Keep things clean and simple with sleek furniture and neutral tones.
Next, don’t be afraid to mix and match different styles. Eclectic decor is all the rage these days, so feel free to combine modern pieces with vintage finds or industrial accents with bohemian touches. The key is to find a balance that feels right for you and your space.
Lastly, don’t forget about the little details. Throw pillows, wall art, and decorative knick-knacks can all add a personal touch to your home. And remember, it’s okay to be a little quirky – after all, your home should reflect who you are and what you love!
Showcasing Your DIY Creations in Your Living Space
So you’ve spent hours slaving away on your latest DIY creations, and now it’s time to show them off in your living space. Let’s make sure your hard work doesn’t go unnoticed!
First things first, let’s find the perfect spot to showcase your masterpieces. Are they eye-catching enough to be front and center, or should they be strategically placed in a more subtle location? Consider the following options:
- Feature Wall: Create a focal point by displaying your DIY creations on a feature wall. This is perfect for larger pieces or items with bold designs.
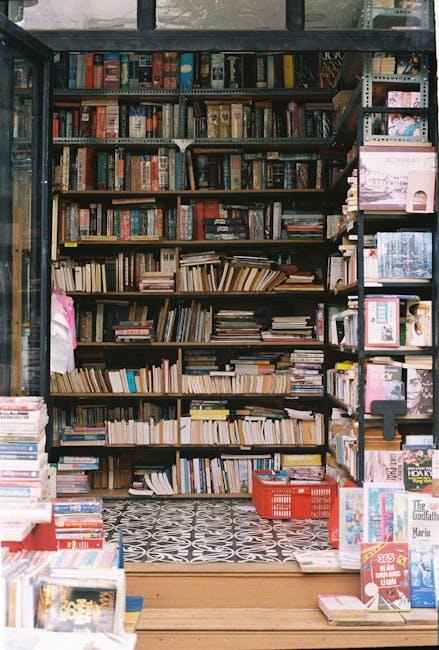
- Bookshelf Display: Show off your smaller items by arranging them on a bookshelf. Mix in some books and plants for an eclectic look.
- Gallery Wall: Group together your DIY creations with some complementary art pieces to create a gallery wall. Don’t forget to mix up the sizes and shapes for visual interest.
Once you’ve decided on the perfect location, it’s time to get creative with the way you display your DIY creations. Here are some fun ideas to make them stand out:
- Use Unexpected Materials: Think outside the box and display your creations on unconventional materials like vintage ladders, old suitcases, or even floating shelves made from wooden crates.
- Layering: Create depth and dimension by layering your DIY creations. Hang artwork in front of a rug or overlap different pieces for a dynamic look.
- Groupings: Group similar items together for a cohesive display. Mix and match textures, colors, and shapes to create a visually appealing arrangement.
FAQs
Q: What makes DIY home art projects different from store-bought decor?
A: Well, when you make your own home art, not only do you get to flex those creative muscles, but you also get to infuse your space with your personality and unique style. Plus, there’s nothing quite like the satisfaction of telling guests, “I made that!”
Q: I have zero artistic talent. Can I still tackle DIY projects?
A: Absolutely! The beauty of DIY home art projects is that there are so many different techniques and styles to try. Whether you’re a seasoned artist or a complete beginner, there’s something out there for everyone. And hey, even if your creation looks like a preschooler’s finger painting, at least you’ll have had fun in the process!
Q: What are some affordable materials I can use for DIY projects?
A: Get ready to raid your recycle bin because cardboard, old newspapers, and glass jars can all be transformed into stunning pieces of home art. Don’t forget about nature either – leaves, branches, and flowers can be used to add a touch of the outdoors to your space.
Time to Unleash Your Inner Picasso!
Now that you’ve discovered the endless possibilities of home artistry through DIY projects, it’s time to grab your supplies, unleash your creativity, and let your inner Picasso shine! Whether you’re a seasoned DIY pro or a beginner looking to dip your toes into the world of artistry, there’s a project out there waiting for you to tackle. So go ahead, get crafty, and let your home be a reflection of your unique style and creativity. Who knows, you might just surprise yourself with what you can create!